How Snapshots Saved My Time Machine Backups
Until last year I kept my Time Machine backups on a USB drive next to my computer. And although everything worked fine, I didn’t feel comfortable with so much data stored on a single disk. Hence, during summer 2020, I bought myself a DiskStation DS1520+ to put my Time Machine backups on a much more secure and reliable solution. The DS1520+ supports a RAID. Consequently, my data would not be lost caused by a single disk error. Synology has excellent documentation, how you can enable Time Machine backups to a NAS over SMB.
And everything ran very smoothly until I upgraded to macOS Monterey. Afterward, the Time Machine backups gave me some headaches. Quite often, macOS told me it can’t perform any new backup. The error message was:

This wasn’t an issue with the hard disks; the disks were ok. But for some reason, the Time Machine Backups went corrupt. Fortunately, I remembered that I enabled Btrfs snapshots for most folders on my NAS. This allowed me to go back to a time when the Time Machine backup was still ok. In the end, I only lost the incremental backups of a single day.
Btrfs snapshots are a life-saver. I have snapshots enabled for all my shared folders, which contain important files. e.g.
- Photos
- Videos
- Personal Files
- Time Machine Backups
Snapshots are quick to take, easy to restore, and pretty lightweight. For my 1,800 GB Time Machine backups, I have snapshots of less than 40 GB. (~2.2 %). And that is why you should enable them as soon as possible for your valuable files.
Enabling Btrfs Snapshots
- Open the Synology Disk Station Manager, and check in the Package Center under Installed that the package Snapshot Replication is available. Please install this package before proceeding.
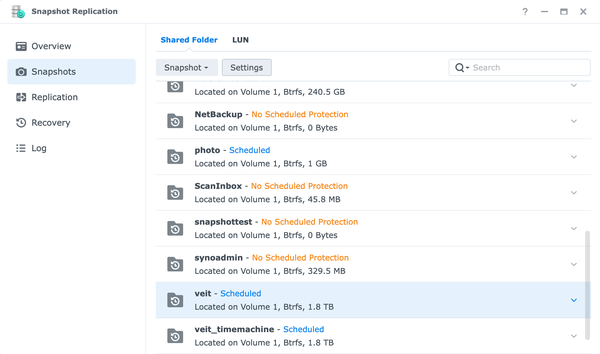
- Open Snapshot Replication, select Snapshots and the Shared Folder you want to configure the snapshots for.
- Select Settings and configure the settings for schedule, retention, and advanced.
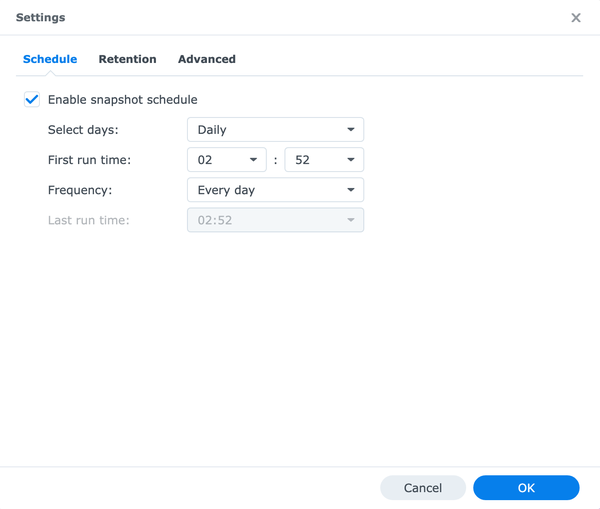
The setting for the snapshot schedule depends on how often your data changes and what is your accepted amount of data loss. For most of my shared folders, it is more than enough to take a snapshot every 24 hours.
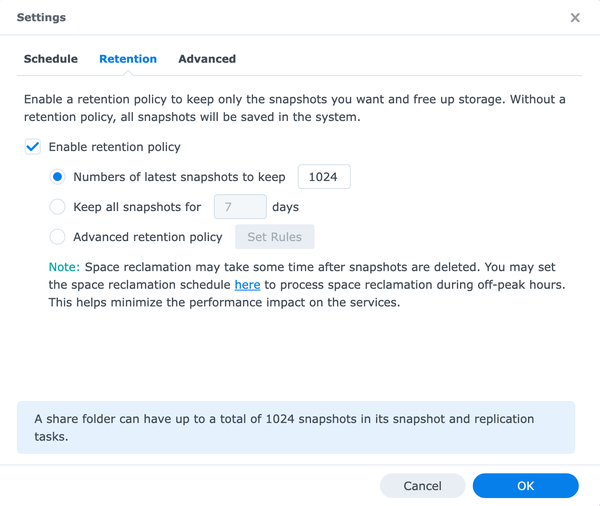
I set the number of latest snapshots to keep to the maximum. If you don’t set up a retention policy, snapshots will stop once you have reached the maximum of 1024.
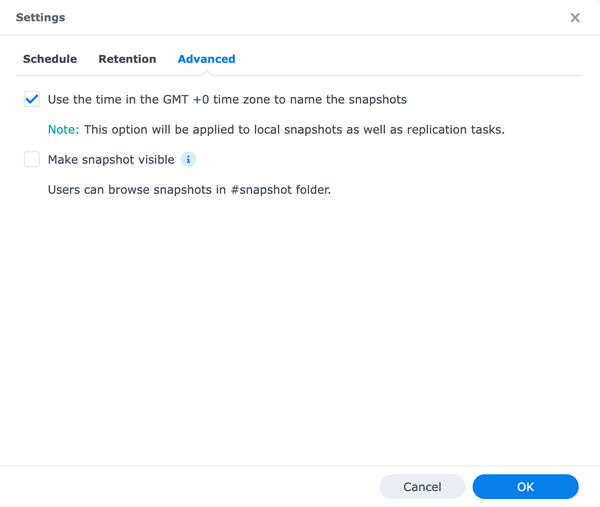
I use GMT time zone to name the snapshots.
- Click OK to complete the configuration.
Restoring from a Btrfs Snapshot
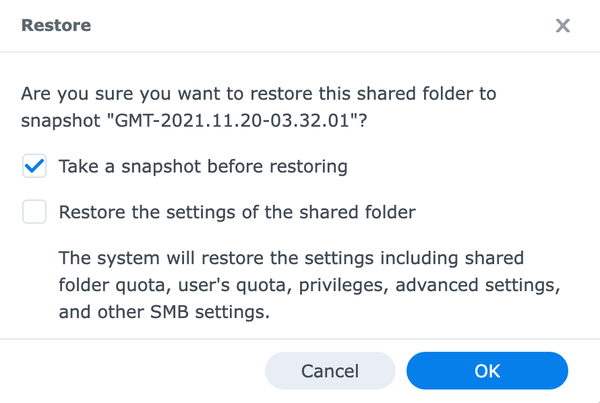
- Open Snapshot Replication, select Recovery and the Shared Folder you want to restore.
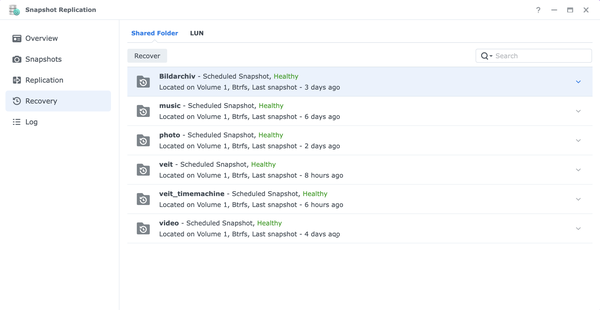
- Open Recover and select a snapshot when everything is ok. The more recent the snapshot, the smaller the data loss.
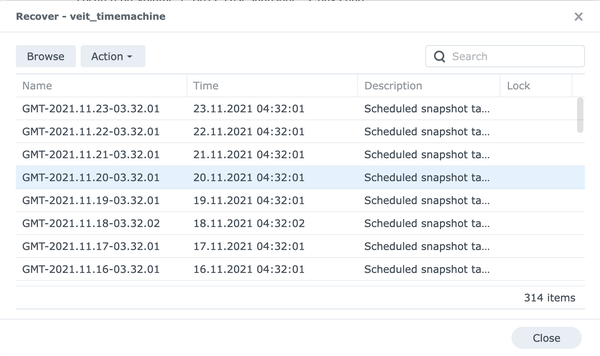
- Open the menu Action and select Restore to this Snapshot.
- In the dialog select, Take a snapshot before restoring to create a snapshot of the current hard disk so that you can always restore to a point in time before the recovery takes place.